E-Mail Routing
E-mail routing turns your incoming e-mails directly into tickets, pre-assigned to a department, and allows you to reply to tickets from the e-mail addresses you've added.
Adding and Editing Addresses
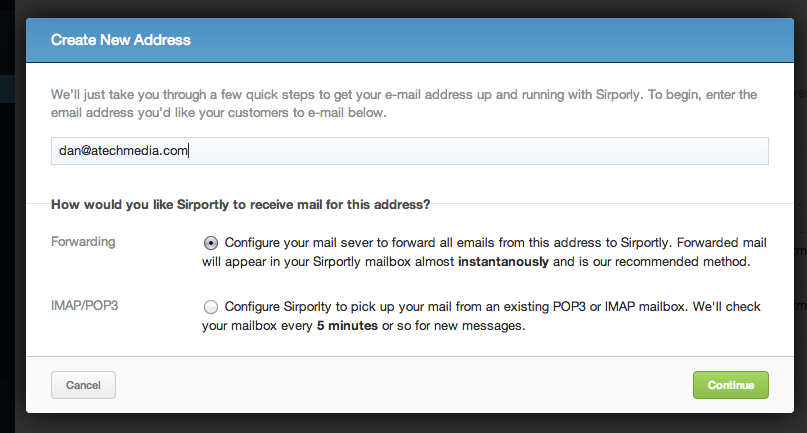
To add a new e-mail address to receive tickets from, go to the E-Mail Routing page (first link under 'Ticket Submission' in the Admin navigation) and click the green button labelled 'Add New Address'.
The first thing you need to do in the box which pops up is to enter the e-mail address you wish to use. If you're just trying out Sirportly, you can enter an e-mail address suffixed '@example.sirportly.com' - any e-mails then sent to that address will appear in your support system with the routing details you added.
Choose whether you'll be forwarding your mail into Sirportly, or fetching it from a POP or IMAP box. There are instructions for setting up both POP/IMAP and forwarding for common mail providers in the Quick Start Guide.

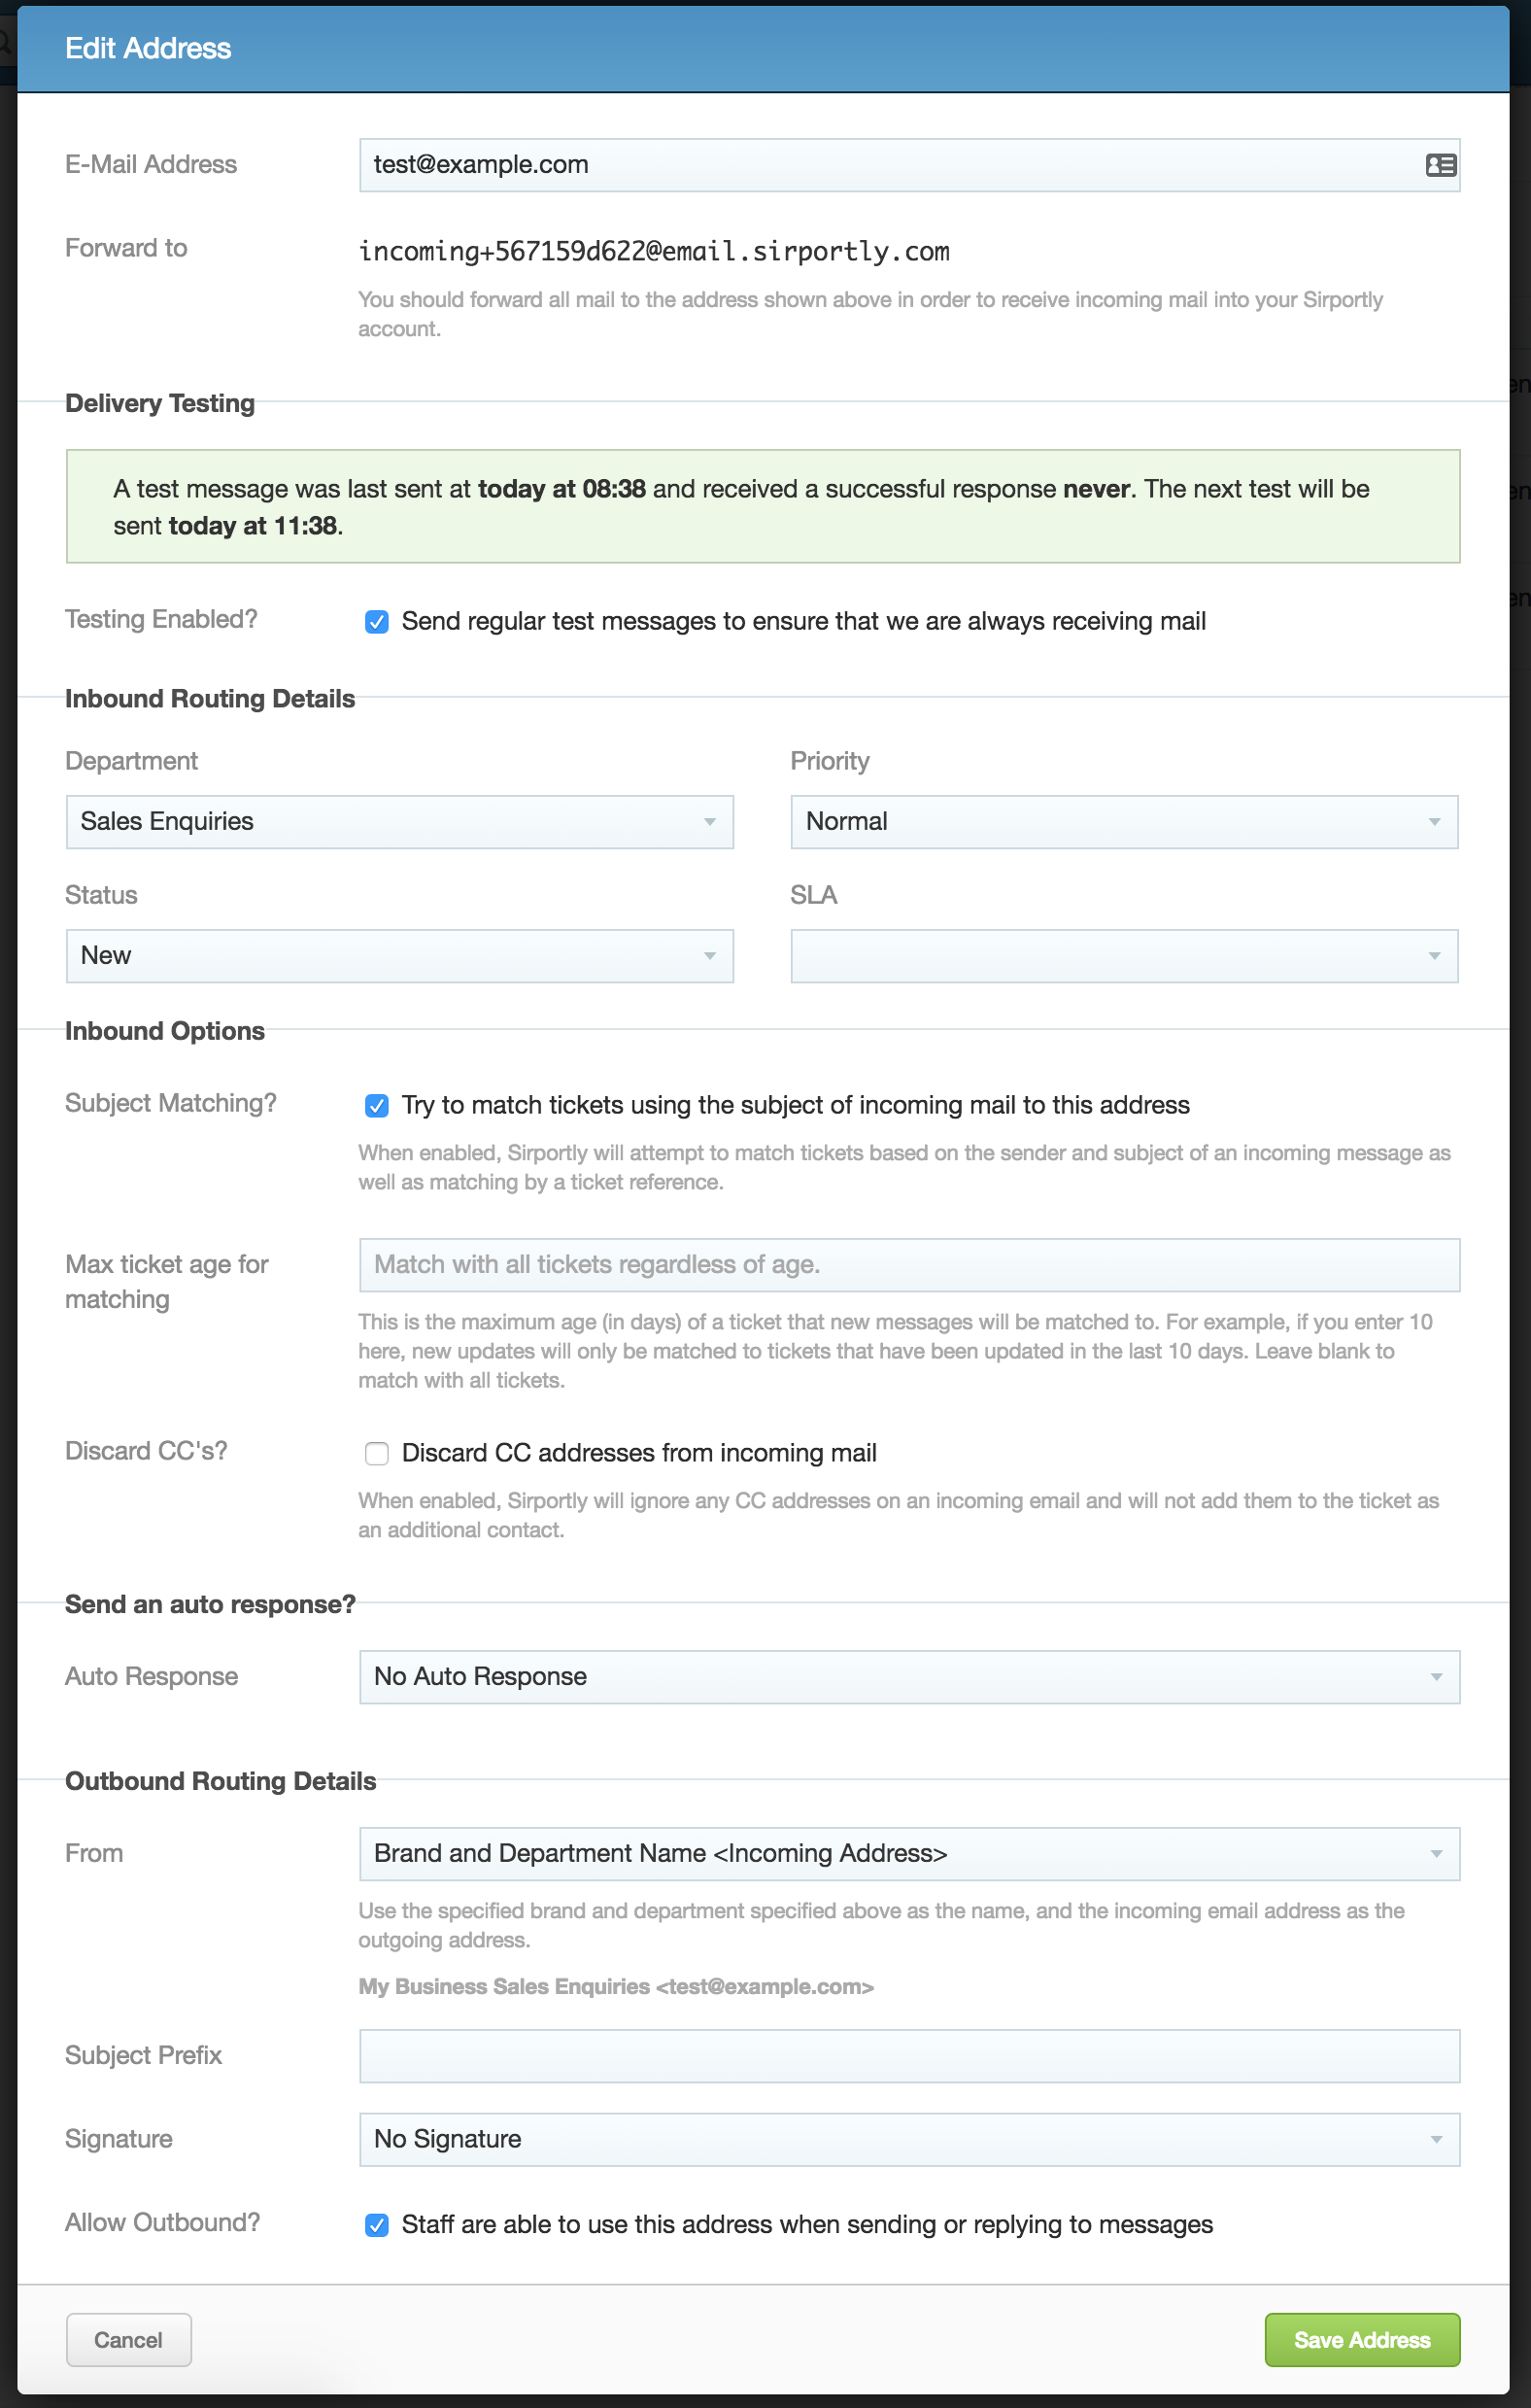
Once your address is created, we can configure the routing details for it.

Inbound Routing Details
Choose the properties you would like tickets submitted via this e-mail address to have - what department you want them to be in, their priority, status & SLA. Remember, these can all be changed if necessary for a ticket.
Match by Subject?
When enabled, Sirportly will attempt to match tickets based on the sender and subject of an incoming message as well as matching by a ticket reference. For example, a ticket from "Skylar Rempel" with the subject "Help with my installation" will always update her previous ticket with that subject, even if no ticket reference is present.
Max ticket age for matching
This is the maximum age (in days) of a closed ticket that new messages will be matched to. For example, if you enter 10 here, new updates will only be matched to tickets that have been updated in the last 10 days. You can leave it blank by default to match with all tickets, regardless of their age.
Discard CC's?
When enabled, Sirportly will ignore any CC addresses on an incoming email and will not add them to the ticket as an additional contact.
Send an Auto Response?
You can also choose whether or not you wish to send an auto response to all messages received from this e-mail address. You'll be able to choose from a list of pre-defined responses you've created.
Outbound Routing Details
Outbound routing details are optional, depending on whether or not you wish to reply to tickets from this address or not. If you do, firstly select from the following options for your from name and address:
Brand and Department Name+Incoming AddressCustom Name+Incoming AddressUser's Name+Incoming AddressUser's Name+User's Address;Reply-To Incoming Address
Next choose a prefix for the subject of any e-mails sent from this address (optional, and can include ticket variables), then optionally choose a signature for your outbound e-mails (again, from a list of pre-defined responses). If you don't, simply deselect the 'Allow outbound?' checkbox.
Whilst you can create inbound e-mail addresses you do not wish to send outbound e-mail from, you cannot set up e-mail addresses the other way round. This is because when customers receive an e-mail, they're naturally going to hit 'reply', and send their new message to the address they received the last message from; if you've sent your message from an outbound-only address, you will not receive the customer's reply back into your system.
SPF and DKIM
Sirportly cloud supports SPF and DKIM for all outbound messages via our own mail handling service Postal. However, if you're having issues with outbound emails being recognised as SPAM by the recipient, you can add an SPF record to your own records, as include:in.sirportly.com.
Viewing Addresses
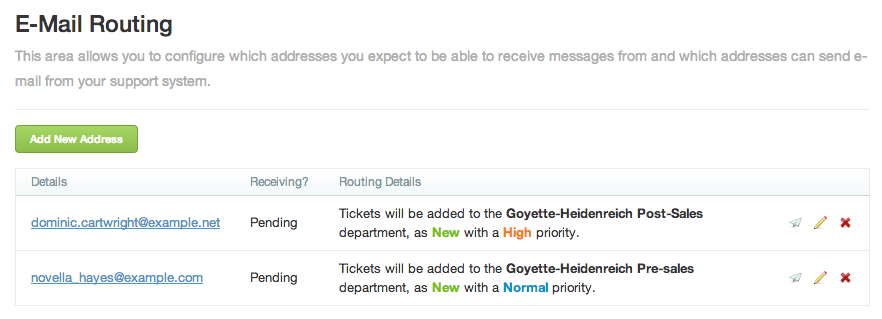
Your new e-mail address will now appear in the list on the E-Mail Routing page:

The 'Details' column provides a list of all the e-mail addresses you've added. By clicking on the e-mail address, or on the pencil icon on the right, you can edit the details of the e-mail routing for that address - the sections will be the same as when you added the address, but with one addition: Delivery Testing.
Delivery testing occurs at hour-long intervals to ensure that all your e-mail addresses are forwarding to Sirportly correctly, and you're not missing out on any tickets. This information is also shown in the 'Receiving?' column - a green tick if everything is working, a red cross if something is wrong, and the word 'Pending' if a test e-mail has yet to be sent (as will be the case when you first add a new address). You can force a test e-mail by clicking the paper plane icon in the E-Mail Routing screen.

The third column, 'Routing Details', provides a quick view of where e-mails sent to that address will be placed in your support system, and with what properties.
To delete an e-mail address, click the red 'X' on the right. You will no longer be able to receive or reply to tickets through it.