Public Interfaces
Please Note: Public Interfaces have been deprecated in favour of Support Centres.
Public interfaces allow your customers to connect directly to your support system - submit tickets, keep track of their discussions, and view your knowledge bases.
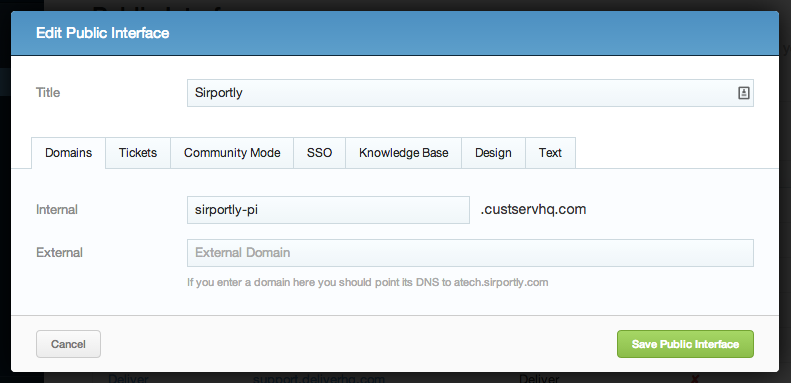
The Public Interfaces page (seventh link under the 'Ticket Submission' section in the Admin navigation) shows a list of all the public interfaces you've created. Public Interfaces are now deprecated so you will be unable to create any new ones. To edit a public interface, click the pencil icon. A popup will appear with seven tabs, now you can start configuring your interface using the tabs.
Domains
The first tab, 'Domains', sets the domain for your customers to visit to access the interface. You'll need to choose an internal subdomain, attached to the custservhq.com domain, and also, if you prefer, choose one of your external domains for your public interface - you will then need to point its DNS to yourusername.sirportly.com.
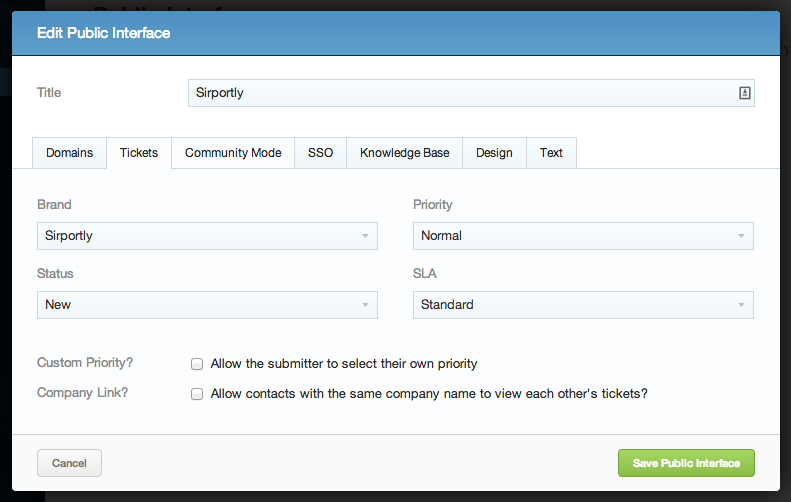
Ticket Submission
'Ticket Submission' is the second tab. In it, you choose what brand, status, SLA and priority you want incoming tickets to have. You can also allow your customers to decide upon the priority of the ticket themselves.
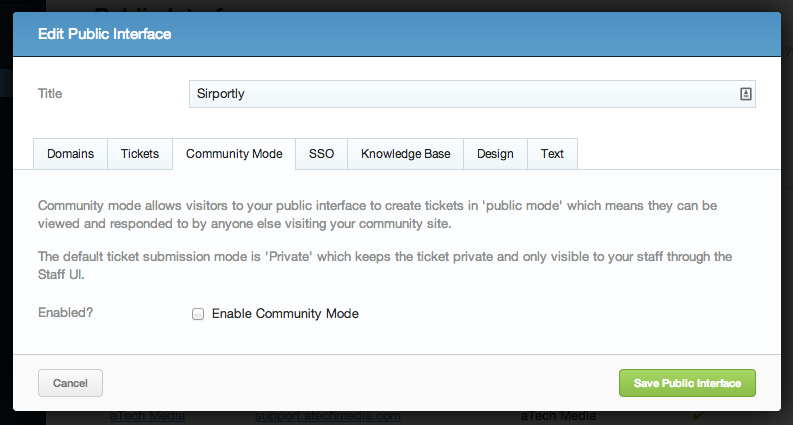
Community Mode
The 'Community Mode' tab allows you to enable ticket creation in 'public mode', which means that any customers visiting your community site will be able to respond to the ticket. The default method of submission will still be 'Private', so that only the customer who submitted it and your staff members will be able to view it.
SSO
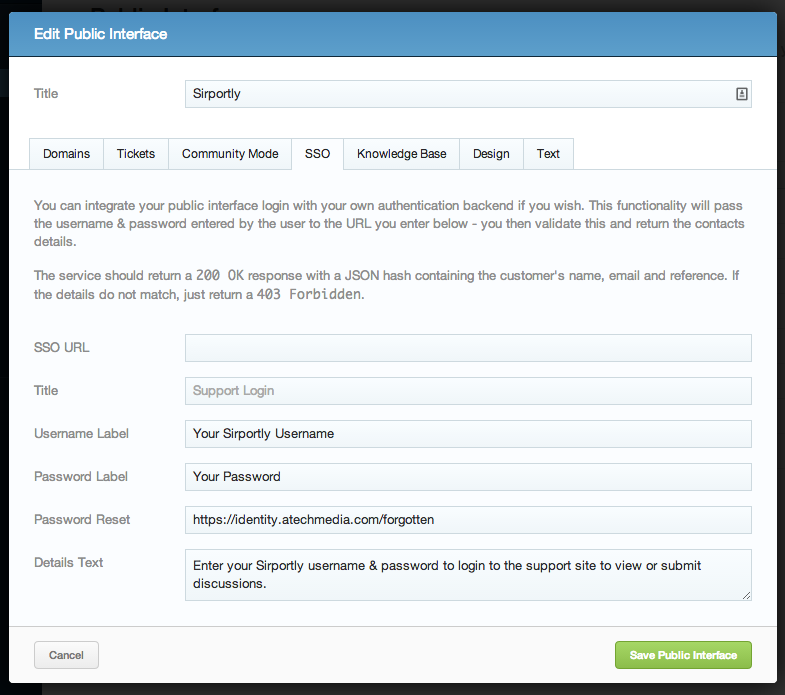
'SSO' allows you to integrate your public interface with your own single sign on authentication.
Knowledge Base
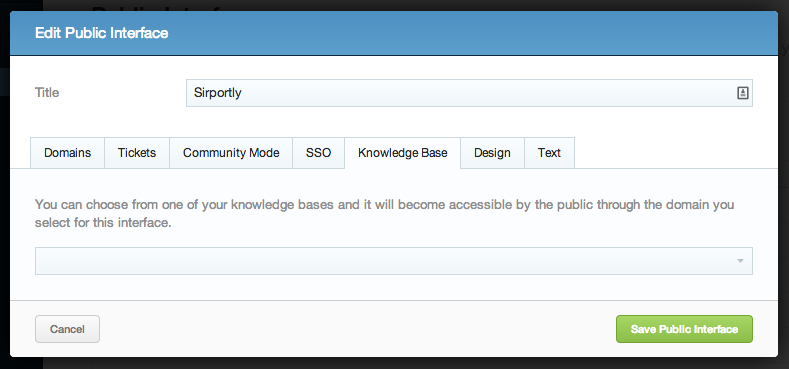
The 'Knowledge Base' tab allows you to choose one of your knowledge bases to be accessible to the public through your public interface.
Design
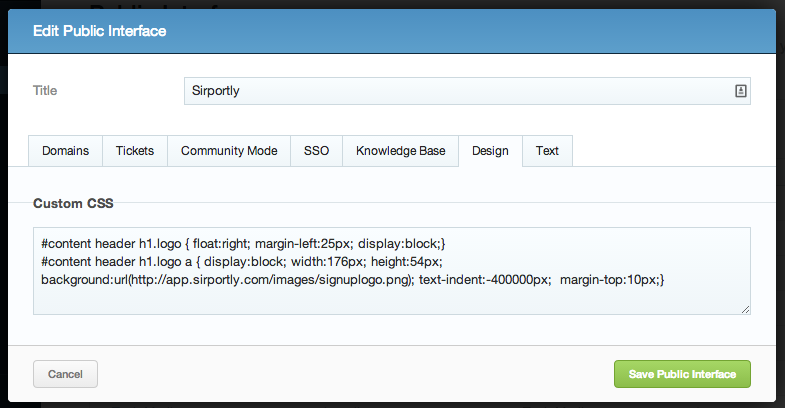
The sixth tab, 'Design', allows you to enter custom CSS to complete restyle and rebrand your public interface so that your customers can move seamlessly from your main site and back.
Text
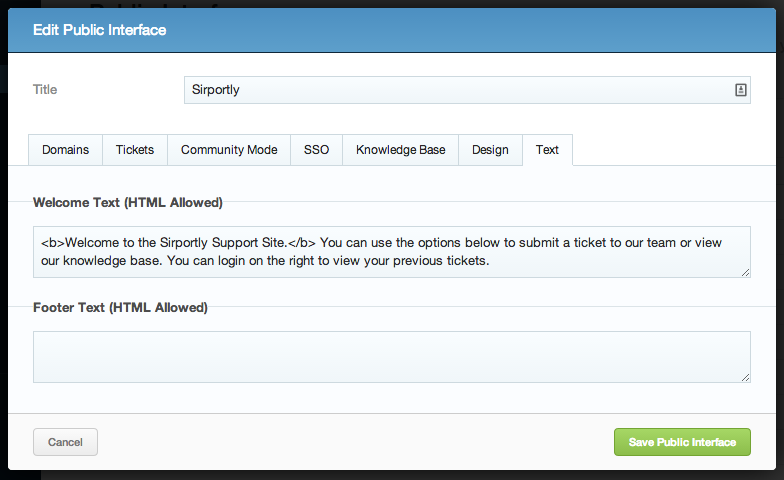
The last tab, 'Text', simply allows you to enter the standard 'welcome' text you'd like on your interface, and also the text you would like to appear in your interface's footer. Both of these boxes allow HTML to be included.
Deleting
Clicking the red 'X' next to the pencil will delete your public interface - you will lose any text & any custom CSS you may have entered. Any tickets submitted through the interface will still be accessible to your staff, but your customers will no longer be able to log in to the interface to view them.
Viewing
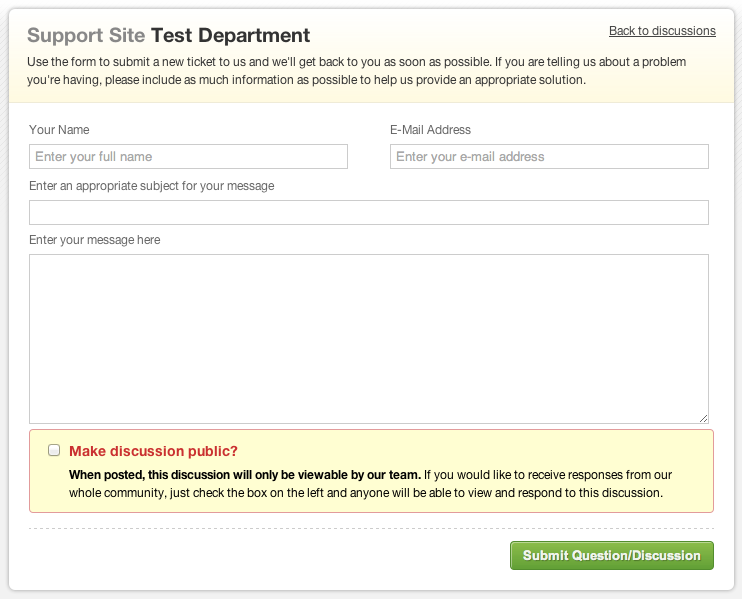
Clicking on the link under the 'Domain' column will take you to your support site. Where, in the screenshot below, it says 'Test Department', there will be a list of the different departments within your chosen brand. The screenshot also shows the default styling of the public interface - this can be completely altered using custom CSS.
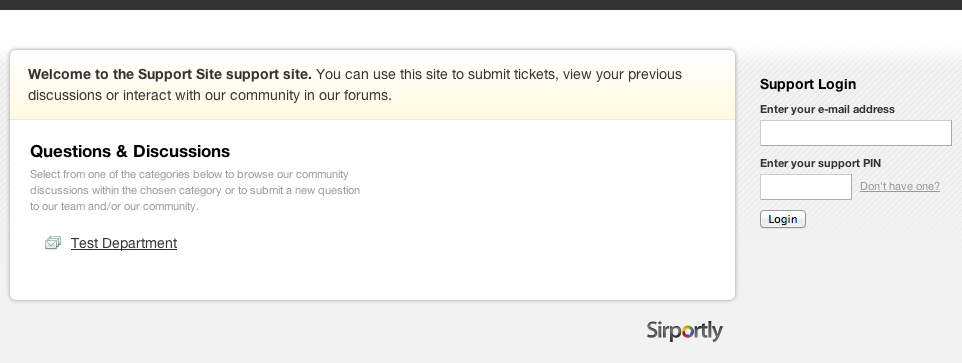
Your customers would select the department from which they wished to submit or view tickets, and would be presented with a list of the public tickets and their own previous tickets. To submit a new ticket, they would click the button labelled 'Post a new discussion'.
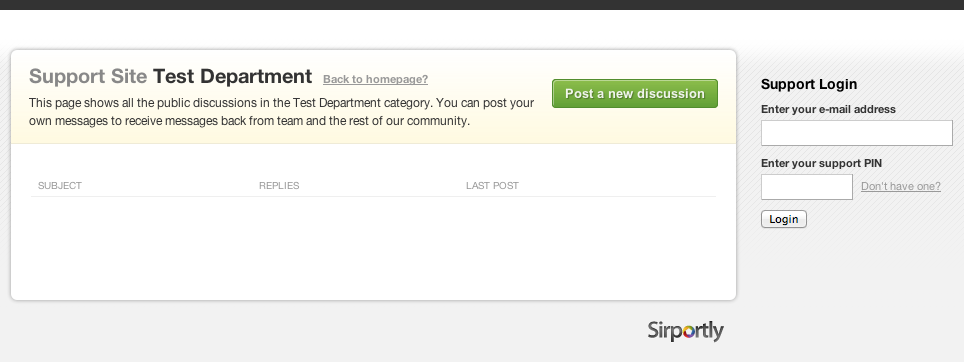
Your customer will have to enter their name, e-mail address & an appropriate subject for the message they're sending. They may also be able to choose whether or not to make their message and the subsequent discussion public (depending upon the settings you chose when creating the public interface - see above under 'Community Mode'. If a customer accidentally makes a ticket public, it can be made private through the Tickets interface. If you've created custom fields, these will also be visible in the ticket submission form.