Create New Ticket
New tickets can be created by staff members through the Tickets Interface. Click the Create Email Ticket link to the top left of the screen to create an Email Ticket, or Create Telephone Ticket just below that to create a Telephone Ticket.
Email Tickets
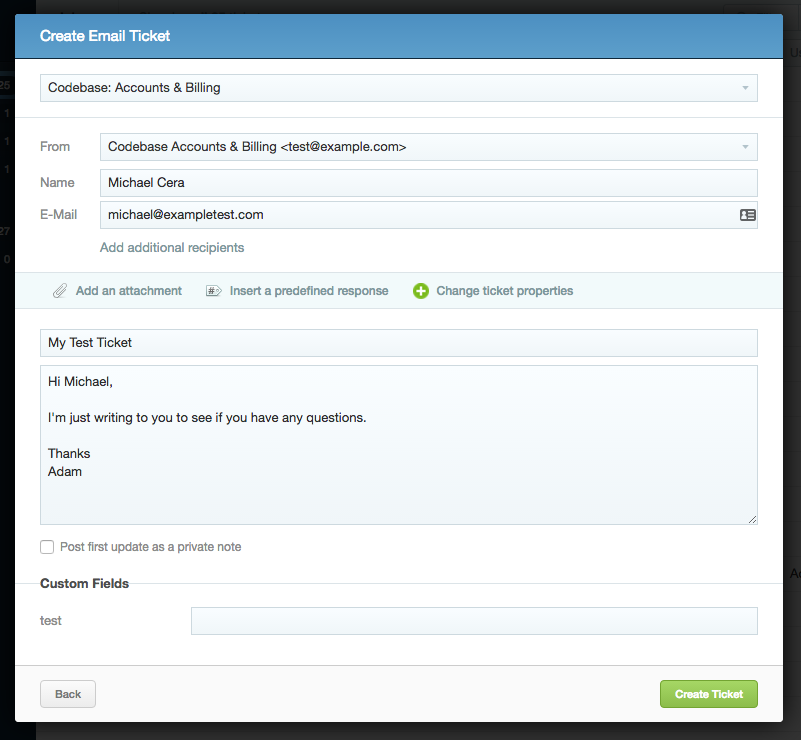
When you initially click Create Email Ticket you'll be presented with the following dialog:

Choose a department at the top, then you'll find the From address will be automatically populated with the associated Incoming address, but you'll be able to change it to either another department address or an associated brand address in the From dropdown. Next enter a name or email address for your recipient, and Sirportly will locate anything that already exists. If the contact isn't yet added to your address book just add the name and email address, then Sirportly will save it for next time.
If you wish to enter any additional e-mail addresses to be CC'd you can also do this here by clicking Add additional recipients below the main contact's E-Mail:

Enter the E-mail address of your contact, and Sirportly will again either locate one that exists, or add it to your contacts when you save the ticket. Just press tab when you're finished, then you can either add a new CC or continue to enter your subject and message. Checking Post first update as a private note will not send the message to the customer.
If you wish to add an attachment to your ticket just click Add an Attachment, then locate the file you wish to attach to the ticket.

Next if you would like to add a pre-defined response to your message, click Insert Pre-defined response, then locate one in your list - clicking Insert to add it to the message.

If you wish to choose the initial status, priority, team, assigned user & SLA for the ticket click Change Ticket Properties - remember, these can all be changed later if necessary.

Finally, enter any custom field data that you've configured then when you're finished, simply click Create New Ticket.
Telephone Tickets
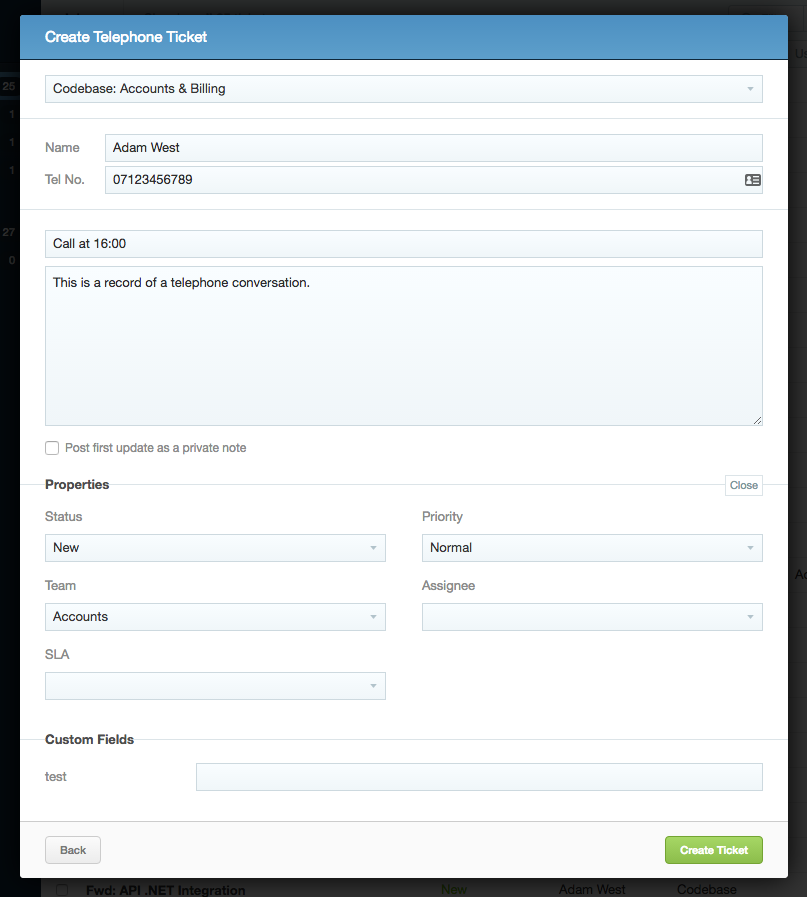
Clicking Create Telephone Ticket brings up a very similar dialog to an E-mail ticket:

You'll be able to choose a department, add the Name and Telephone number of your contact, then enter a subject and message. Clicking Change Ticket Properties will allow you to update any properties such as the status, priority, team or assigned user. Enter any custom field data then once you're done, click Create Ticket to finish.