Responding to Tickets
To respond to a ticket, you must first open the ticket - this can be done by clicking its subject, or its unique reference number.
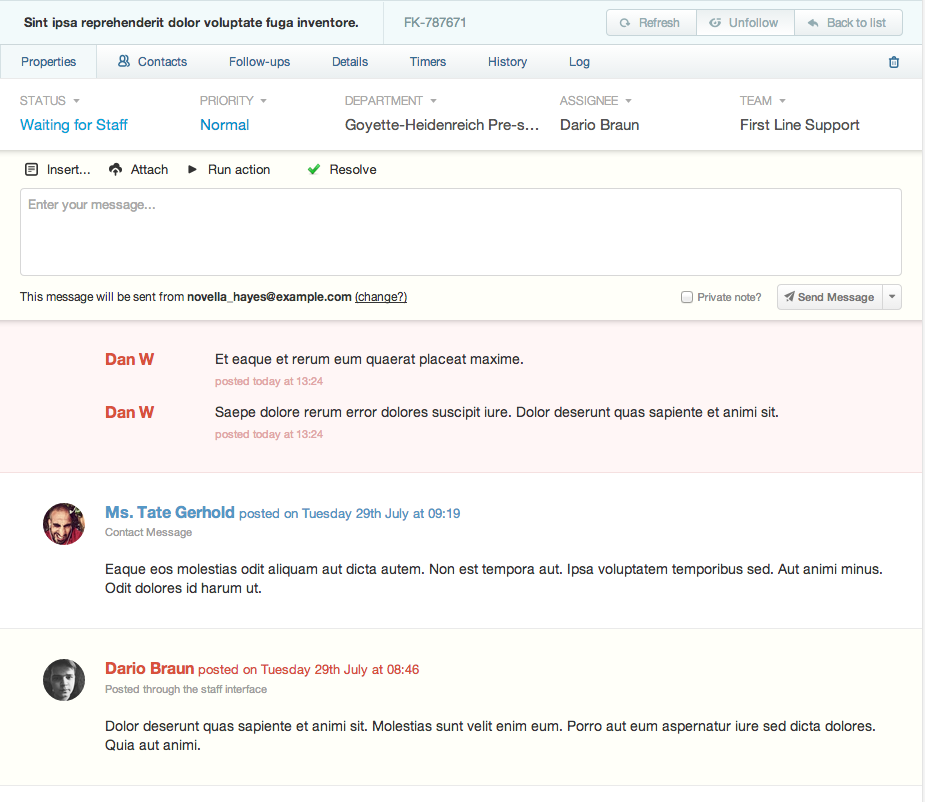
Your opened ticket will look approximately like the image below - it will likely have a different status, priority, assigned team, assigned staff member & department, as well as being from a real customer, with a real message and a real subject. You may also be able to see other buttons added using macros, and you will have set up your own e-mail address from which to reply to customers using e-mail routing. What will stay the same is that messages from customers will be white, staff replies will be yellow, and private notes (only visible by staff) will be red.

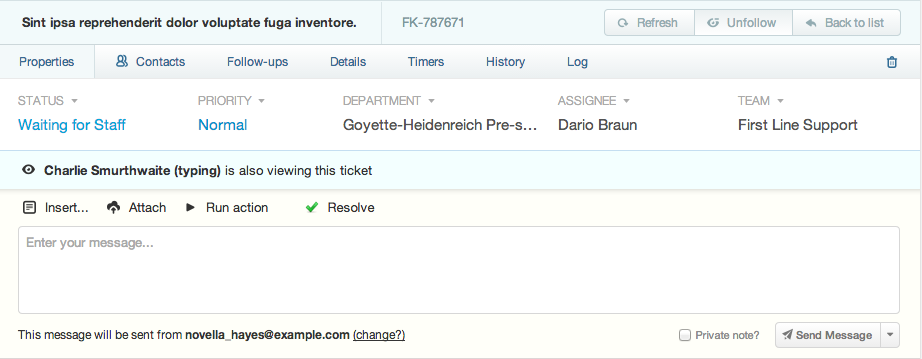
If another staff member is already viewing the ticket, there will be a message above the answer box to let you know, so that you aren't both answering the same ticket simultaneously. It will also appear if someone else opens the ticket whilst you're still viewing it. If "(typing)" is displayed next to their name, it means they're currently typing a response.

To reply to the customer, simply type your message and press "Send Message". If you wish to change the e-mail address the message is being sent from, the subject of the message or you want to CC someone in on the message, just click "change" below the answer box. Your message will be sent to the customer, and appear on the screen in the discussion history.

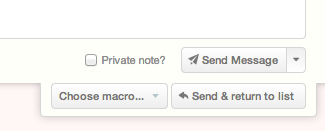
If you'd like to run a macro after the message is posted, expand the drop down menu next to the "Send Message" button and select the macro that you'd like to run. From here you may also select "Send & Return to list" to return you to the tickets list. To change which button is displayed by default see (Company Settings)[^/admin/company-settings].
If the ticket was submitted through a public interface, it's possible to respond to the ticket by posting an update to the public interface without e-mailing the customer the response - just select 'Do not e-mail this update to the customer' from the drop down of e-mail addresses you can send the message from.

As well as replying to the customer in this way, you are able to add private notes to the discussion, only visible by staff members, to hold useful information or simply communicate with other team members. You just need to click the 'Private note?' checkbox on the right of the message box before you 'Send Message' - the entire box will turn red. As mentioned earlier, private notes will appear in the discussion with a red header.

If you want to keep track of the ticket's progress, you can click the button at the top of the ticket labelled 'Follow' - any tickets which have had updates made since you last viewed them will show up in your notifications. By replying to a ticket, you automatically subscribe to it.

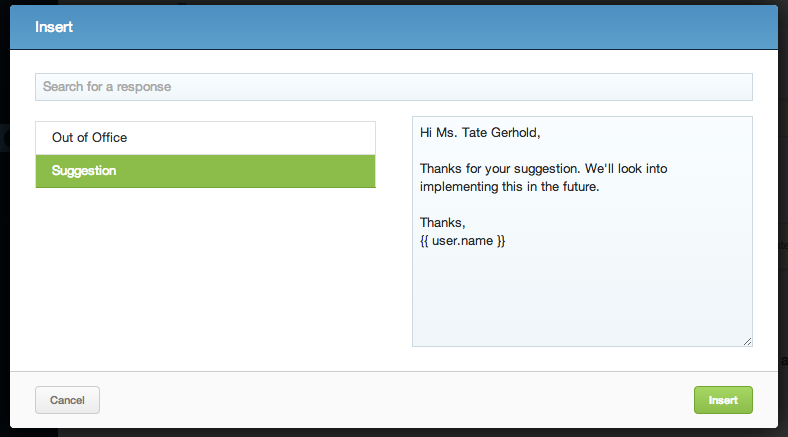
When responding to tickets, you can also use pre-defined responses - just click 'Insert' and select the response you wish to use. It will be entered into the message and you will be able to edit it as you wish.

There are four ways to delete a ticket, all three of which can be found under the trash can icon at the top-right of the ticket: Merge Ticket, which will delete this ticket, having moved all its contents into another; Mark as SPAM, which deletes the ticket and adds it to the spam list; Mark as SPAM and Block Sender, which deletes the ticket and then adds the e-mail address it was sent from to your blacklist (see SPAM filtering for more details); and Move To Trash, which simply removes the ticket from your support system.
Embedding Images in Ticket Messages
If you're replying to a ticket and wish to embed an image in your response, you can use the code below to insert an externally hosted screenshot in your site.
{{img: http://domain.com/path/to/image.png}}
These images will be embedded in the web interface as well as in the outbound e-mail to the customer if HTML is enabled for your mail template.